In part 1 I painted the porcelain tile of my tub surround. Next came walls and trim and finally … the ceramic tile floor.
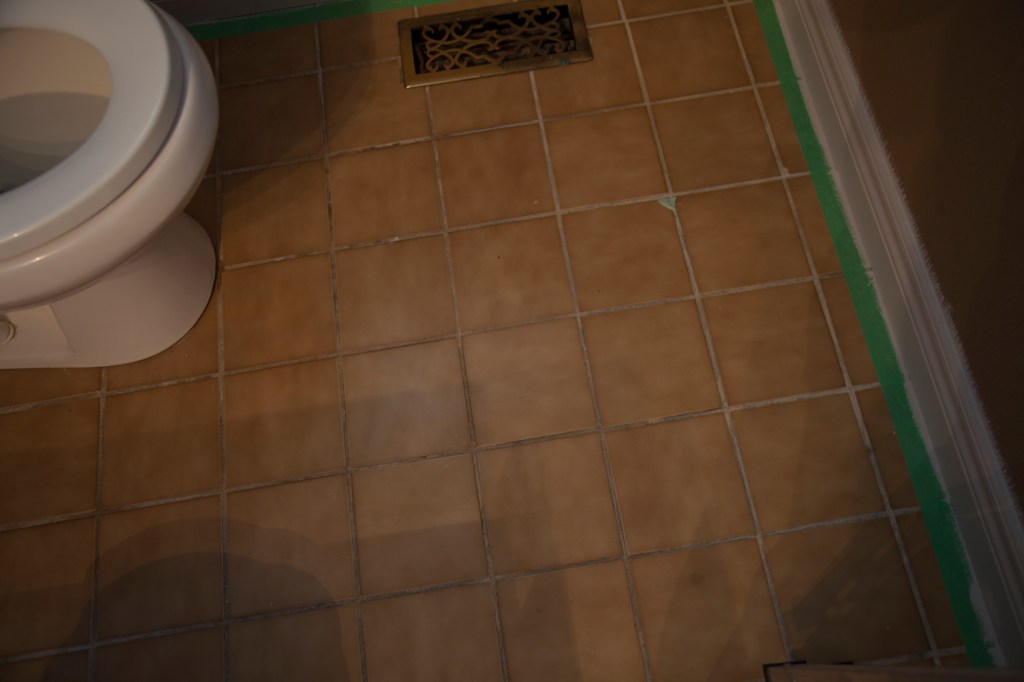
The sad, beige, mid-80’s tile was great when the bearded guy bought and installed it all on his own. And even better was the WHITE grout he used …. IN THE BATHROOM! Anyway, I digress. The tile has seen better days and it’s time for a change.
Now remember, part of my challenge is not to replace any flooring. So it must be painted.
Ceramic is a little different from porcelain as it is more porous, however, it’s a floor and will be walked on so it has to be durable. That’s where Tino comes in. Tino is my helpful associate in the FLOORING department at my local Home Depot. He recommended Custom MPB (Multi-surface Bonding Primer) to give me the grip I needed for the paint to adhere.
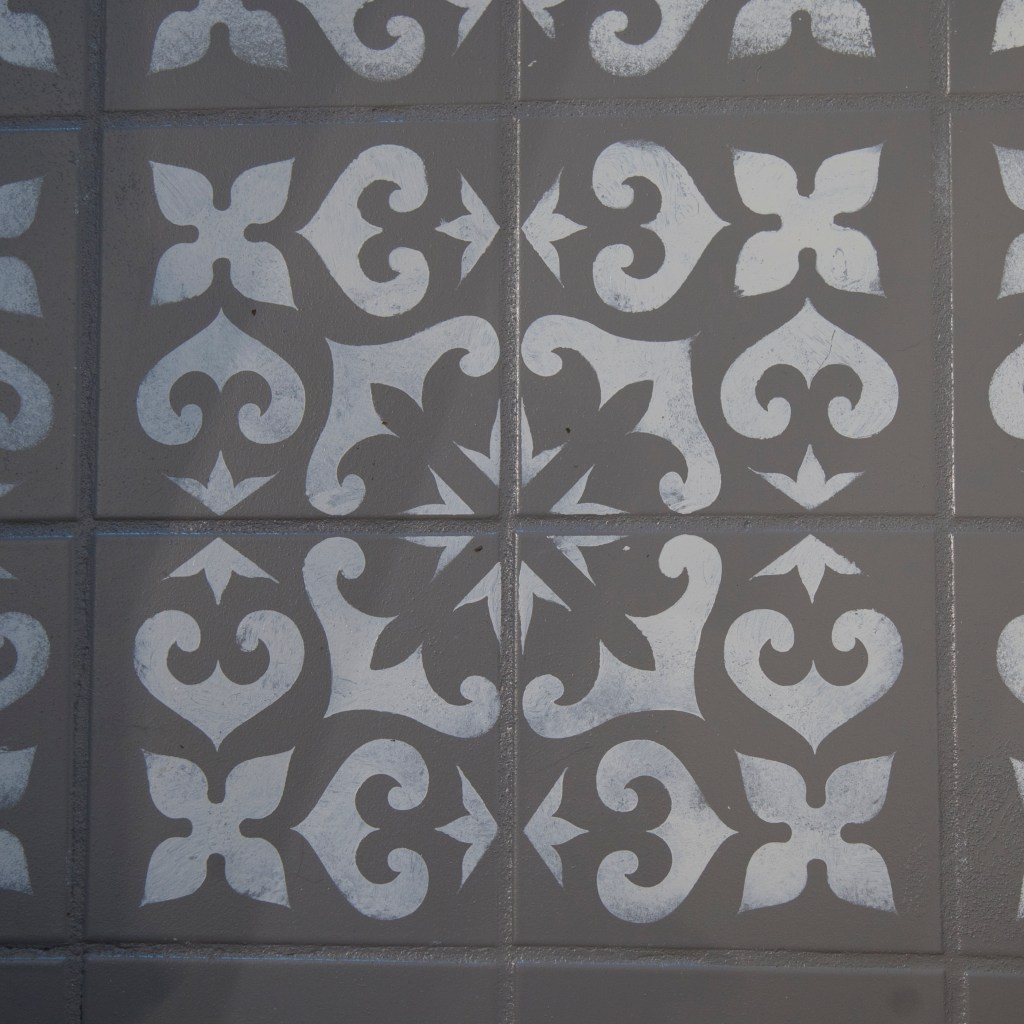
I was going for a handmade, concrete tile look.
To get that look, here’s what you’ll need.

You’ll need the Custom MBP, paint (preferably in gloss as it is the most durable), a stencil, painters tape, a roller and a stencil brush. I used the trim paint with the stencil. Here are the steps I took:
Step 1: Wash and rinse your floor to get all dirt and grease off.
Step 2: Tape the fixtures, baseboards, walls, etc. that meet the floor.
Step 3: Roll a thin layer of the Custom MBP on the floor. **This applies a gritty layer on the floor for the paint to adhere to. Try not to overlap as you roll to avoid creating uneven amounts of grit. If you have heavy spots you can sand them down after it dries.
ALSO – it is blue and will stain so don’t wear good clothing and be neat with your application.
Step 4: Roll your base colour evenly over the floor. Let it dry for 24 hrs and then give it a second coat. Let that dry completely.
Step 5: Apply your stencil pattern. I as really lucky to find a stencil that fit perfectly on 4 tiles. I used a stencil brush because I wanted an uneven, handmade look, but if you want a more precise pattern you can use a roller. Start with the tiles where you can use the full stencil pattern. And start at the furthest spot working toward the door so you can get out when you’re done.

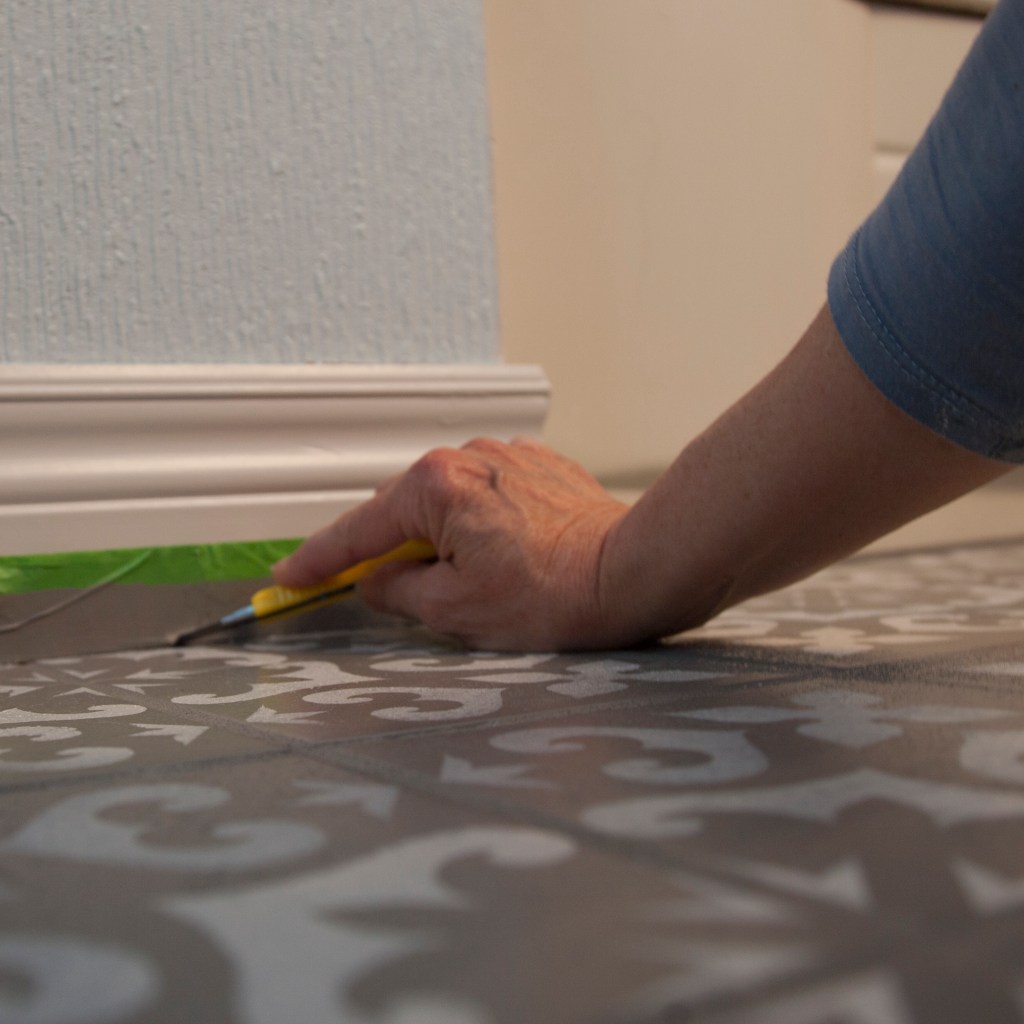
Once you finish the whole tiles you’ll need to start cutting your stencil down to fit the spaces that are smaller. Plan that out carefully so you don’t run out of stencil before you finish. It’s a great idea to buy 2 of the same stencil to make sure you can fit all the spaces.
Depending on the foot traffic you expect you may want to apply a sealer. 2 coats. 1 North/South and 1 East/West to create a strong bond.
Here’s a tip for removing the tape when you are done. Score between the tape and the floor with an exacto knife or box-cutter as you pull off the tape. And pull slowly. This will avoid lifting spots off the floor that may not have dried completely.
And here’s the finished product!
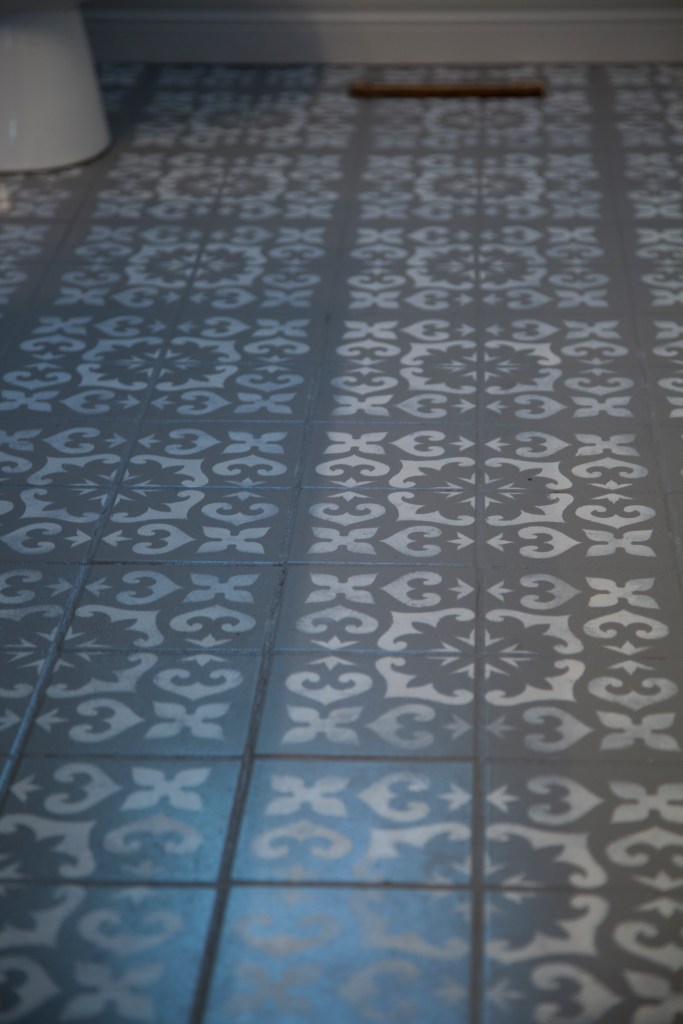
I just love it! It feels good to walk on and finishes the room off perfectly. We’ve had it for about a month. We’ve dropped stuff on it, washed it, dragged things across it and we have no chips or scratches.
So be brave and go for it!!

Leave a comment